The files below are copies of the Windows XP driver software for the EEE pc taken from the DVD that came with my EEE pc 4G. These drivers also work for the 2G and 8G models. I should have made this post awhile ago but it's better late than never. I've posted each driver separately because their combined size is over 100 mb and that is a large file to download when you may only need one or two of the drivers. One more thing to remember is that you should install the acpi and chipset drivers before the others (audio especially).
Forget all the people who told you Vista wouldn't work on the limited space of the Eeee... check out the video below, then check out how to do it.
The Video:
* caveat: When I was recording the video, everything felt slower than it was earlier... I realised that I had just turned on Disk Compression, probably didn't help. Should give more space tho =)
The Deets: To make this work, I started with... - An Eee PC, completely unmodified (4GB version, 512MB RAM) - A SD card (you'll need this, 2GB minimum, the bigger the better. I'm using 8GB, which are nice and cheap now) - A Vista DVD - A 1GB USB stickHere's what I did! - Download vLite from http://www.vlite.net/, and use to create a custom ISO with bits of Vista removed you don't need, the edition you want (I used Home Premium), such that it'll fit on your USB stick. - Format USB stick with a single FAT32 partition, and set active. I did it in Vista, with the following commands from a command prompt (with admin rights):
CODE DISKPART LIST DISK (note the number of your USB drive at this point) SELECT DISK 1 (or the appropriate number from the command above) CLEAN CREATE PARTITION PRIMARY SELECT PARTITION 1 ACTIVE FORMAT FS=32 ASSIGN EXIT
- Format USB stick with a single FAT32 partition, and set active. I did it in Vista, with the following commands from a command prompt (with admin rights):
- Copy contents of your newly created ISO to the stick (you can extract the ISO with WinRAR, burn it to CD, mount it with Daemon Tools etc. etc.) - Insert USB stick into Eee - Turn on Eee, pressing escape at startup to select the USB stick as the boot device - Install Vista, configuring 1 single 4GB partition. - You should now have Vista, but chances are there isn't much space left. Ensure your SD card is in the slot at this point, and showing as drive D:. - You need to download PendMoves and MoveFile to your machine from http://www.microsoft.com/technet/sysintern.../PendMoves.mspx.
Put them in \Windows\System32
Right, now the clever stuff. The thing that stops Vista playing ball on the Eee is it's HUGE side by side directory, \Windows\winsxs. I mean huge... on my machine it was 1.5GB. The real problem is that it's huge AND very difficult to move. We're gonna put it on SD however
- Navigate to the \Windows\WinSXS directory, and view the security properties. You need to first give yourself ownership of the directory, and then give yourself full access (i'd use the administrator account to do this stuff).
- Now run a command prompt, and create a dummy directory. Type 'mkdir c:\windows\winsxs.moved'
- Now that's done, we're gonna create a junction (like a Symbolic link for Vista). Type 'mklink /J c:\windows\winsxs.link winsxs.moved'
- Good, now delete the winsxs.moved directory. Trust me on this one . Type 'rmdir c:\windows\winsxs.moved'
That's the preperation done. Now we need to use MoveFile to schedule renaming of the winsxs at reboot. This is the magic that will give us control over that nightmare directory.
- From the command prompt, run 'movefile c:\windows\winsxs c:\windows\winsxs.moved'. As you can see, this is renaming the winsxs directory before anything can get a hold on it.
- From the command prompt, run 'movefile c:\windows\winsxs.link c:\windows\winsxs'. This puts a winsxs directory back (as far as the OS is concerned), so everything doesn't collapse in a heap.
- Now type 'pendmoves'. It should show the 2 pending moves you've entered above, with NO ERRORS. If it all looks good, REBOOT!
On reboot the critical renames / moves will happen, and we'll be free of the shackles that stopped us messing with that pesky winsxs directory.
- When your PC is booted, again open a command prompt, and 'dir c:\windows\winsxs*'. If it's all gone well, you'll see a winsxs.moved real directory, and the winsxs junction. If it HASN'T worked, repeat the above steps!If it's all good, then we're nearly home and dry. All we need to do is relocate WinSXS and amend the junction.
- Using Windows Explorer, COPY the whole winsxs.moved directory to a \Windows directory on your SD card. As it's HUGE, it'll take ages, and is often quicker using a USB card reader than the internal card reader.
- When this has finished, rename the directory on the SD card from winsxs.moved to winsxs. Go to a command prompt (again!) and type 'rmdir c:\windows\winsxs'. Then, type 'mklink /J c:\windows\winsxs d:\windows\winsxs'.
- To be sure everything is happy, in explorer browse to c:\windows\winsxs. You should see a ton of files. They're really on your SD card
- Reboot
After reboot, you should be able to delete c:\windows\winsxs.moved and FINALLY liberate all that disk space. Now you're at the point where you need to tweak your system. This means reducing / moving the page file, disabling hibernation and so on and so forth. To disable hibernation on Vista, drop to a command prompt and type 'powercfg -h off'.
There's one last thing you should do. When you download Windows Updates etc., the files get put into C:\Windows\SoftwareDistribution, and this will quickly become huge. I recommend moving this to the SD too. It's easier though... stop Windows Update service, move directory, create junction, restart service, DONE!
It goes without saying that when you install apps (e.g. i'm gonna put Office 2007 on), you should install them to D:\Program Files - your SD - where appropriate!
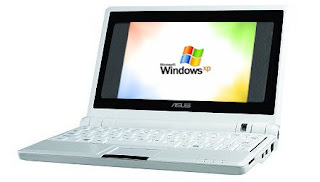
If you’ve been lucky enough to get your hands on a Asus Eee PC I’m sure you have already thought about other tasty operating system you can run off it. While internal storage is limited the unit comes with a SD Card which can now be picked up cheaply from companies like SanDisk. These can be used to run various Linux flavors but what about good old Windows XP? For those of us Redmond zombies don’t worry, this unit runs Windows surprisenly well. So well in fact they even include some basic instructions in manual itself, for those wanting a little more information this is how I did it:
Your first challenge of course is to install via CD on a system without a CD player. If you have an external USB CDROM this will make the process a little easier, those without are going to need a few supplies. You can yank an IDE or SATA CDROM from just about any home computer for this. The only piece of hardware you’ll need to buy is the IDE/SATA to USB 2.0 Adapter which runs about $25US. This great little unit allows you to plug in any CD or HDD drive and have it act like a USB drive. Install the unit as you see below:
The large connection goes where the IDE cable would normally go and connects to the Asus Eee PC directly via USB. The power cable supplies the drive with juice and has an On\Off switch directly on the cable (don’t forget to switch on). Jumper settings on the drive don’t seem to matter since there is only one drive to deal with. Mine was set to Master and the drive was detected correctly.
Insert your bootable Windows XP CDROM and you’re ready to start the install.
The Install Process:
Turn on the unit and press F2 during boot up.
Arrow over to the "Advanced" Tab
Go to "OS Installation" setting and change to "Start" (After the Windows install remember to come back and set this to "finished")
Arrow over to the "Boot" Tab and set your 1st boot device to the new CDROM. This may be listed ATAPI CDROM depending on your drive.
Hit F10 to save your changes and reboot, look out for the "press any key to enter install" text.
The rest of the Windows XP install is pretty standard. When you get to the "where to install" part you’ll want to delete all existing partitions and create 1 with all the available space. Format this drive in NTFS format using the "Quick" option for a faster install. Advance through the screens until your install is done, this part takes about 30 minutes.
Installing Drivers:
It was really nice of Asus to include a Windows XP driver disk in the package even though it ships with a Linux OS. After the install is complete simply insert this CDROM and run the "Install All" option to setup the devices. The machine will reboot a few times and when its done you should have everything accounted for in the Device Manager. If your web cam is not working its because you used a Pre-SP2 install of Windows XP. To correct the issue simply apply the Service Pack 2 and after reboot it should find the camera.
Installing Programs: Since the Asus only comes with a 4GB HDD you aren’t going to have a lot of room after installing Windows XP. This is where the 4GB SD card comes in, toss this in to instantly double your storage space. When installing applications be sure to install them to this drive (Drive E:) and not to the internal hard drive. This should leave you enough room to install just about any of your favorite programs.
Moving My Documents: Once again due to your limited storage space internally you’ll want to move the My Documents folder to the SD card as well. To do this right click the My Documents folder and select "Properties". Click the "Move" button to relocate this folder to the E drive. Now when you save files or photos they will default to this SD card as well.
Upgrading the Memory: My memory is still on order from Amazon so I’ll have to update this part later. The memory install is similar to other laptops, there is small panel in the bottom that needs be unscrewed and wedged off. Here you’ll find the current 512MB that can be replaced with a 1GB or more stick. Please note this of course voids your warranty but what fun are those anyway. This is optional but is recommended for using this device with Windows XP.
Impressions So Far: Everything works great! Actually I’m shocked how well certain apps run off this thing. Even some games like Second Life work great after installing Direct X 10. Response time is quick, can I get solid state hard drives in…well…everything? Before doing a major cleanup I still have 1GB remaining internally and tons of space on my SD card. The only negative so far is the screen resolution of 800×600, while most web sites look fine some apps have issues here. Would love to see a higher resolution version and perhaps a slightly larger monitor. My wife keeps asking to borrow it for coach surfing so it must be a hit.
Problems, experiences or advice for installing Windows XP on the Asus Eee PC? Please leave your comments below.